

3 Things I Wish I Knew Before Building My Golf Simulator
Building a golf simulator at home is an exciting project. But like any big investment, there are lessons you only learn once you’ve gone through the process. If you’re considering a golf simulator installation, here are three things I wish I knew before starting — so you can avoid the same mistakes and build the perfect setup the first time.
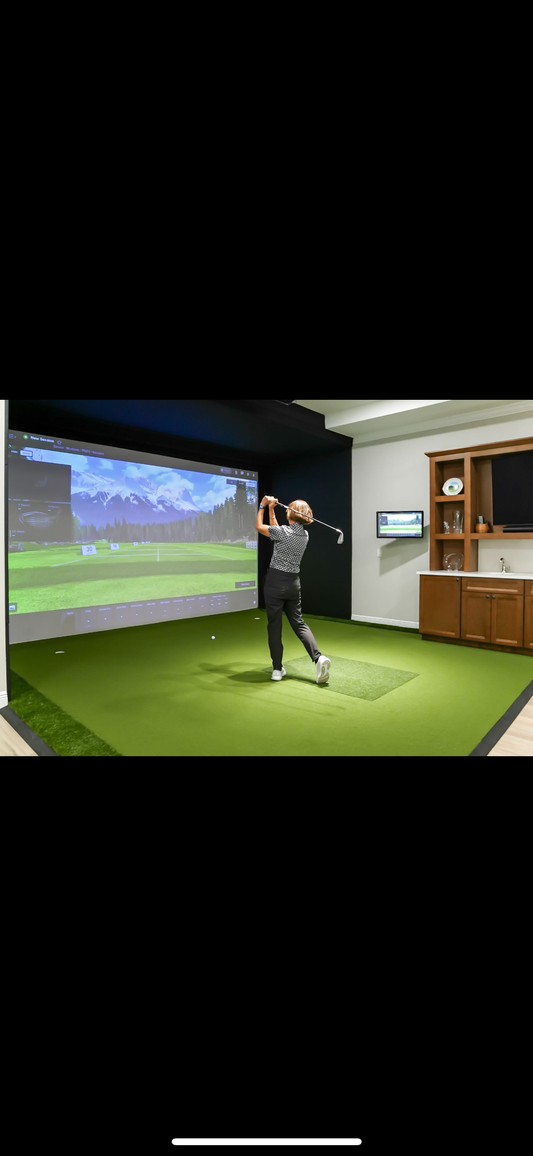
1. Ceiling Height Matters More Than You Think
When I first measured my space, I thought a standard ceiling height would be fine. I was wrong. Having at least 9–10 feet of clearance is crucial for taking a full swing without fear of hitting the ceiling. Low ceilings not only affect your swing comfort, but they also limit your choice of launch monitors and projectors. For example, overhead launch monitors like the Uneekor Eye XO or Foresight GCHawk require plenty of vertical clearance to function correctly. If your ceiling is too low, you may be restricted to floor-mounted options, which can change the entire design of your simulator.
Another issue with low ceilings is ball trajectory. If you’re practicing with higher lofted clubs like wedges, a lower ceiling could cause ricochet or make certain shots impossible. My advice: don’t compromise here. If your space is too tight vertically, it may be better to choose another room or consider raising the ceiling before committing.
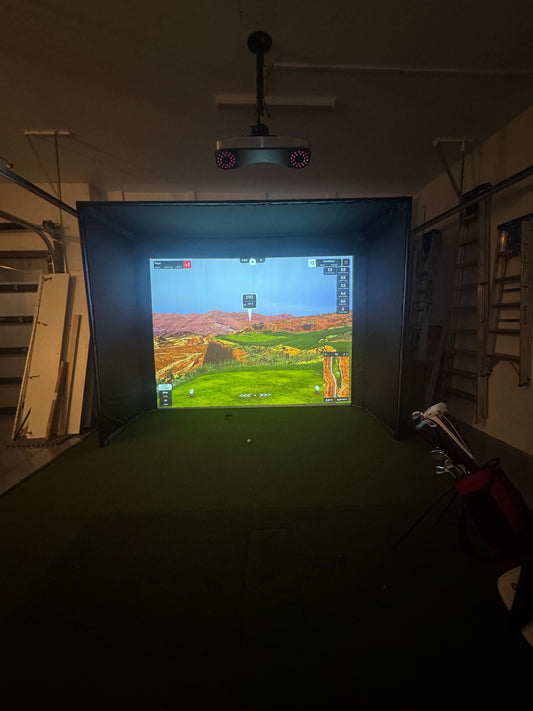
2. Not All Projectors Are Created Equal
Initially, I assumed any projector would get the job done. That mistake cost me both time and money. Golf simulators demand a short throw projector with the right throw ratio to fill your impact screen from a limited distance. Regular projectors create alignment issues, shadows, and often need more distance than your garage or basement allows.
Brightness is another critical factor. Garages and basements often have ambient light or reflective surfaces. A projector with at least 4,000 lumens ensures you’ll get a clear, vibrant image even in less-than-perfect lighting conditions. Resolution also matters: while 1080p is acceptable, a 4K projector takes realism to another level, especially for software like FSX Play or GSPro.
Finally, placement matters. Ceiling mounting is common, but if your garage has a low ceiling or you want flexibility, a floor-mounted projector enclosure can be a game-changer. These enclosures protect your equipment from mishits while delivering perfect alignment.
3. The Hidden Costs Add Up Quickly
When I first budgeted for my golf simulator, I focused on the big-ticket items: launch monitor, hitting mat, and impact screen. What I didn’t realize was how much the “extras” would impact my final spend. Items like projector mounts, protective padding, quality turf, blackout curtains, software subscriptions, upgraded PCs, and even electrical work added thousands of dollars to the total.
For example, subscription fees for premium software (FSX Play, E6 Connect, GSPro) can range from $250 to $1,000 annually. Turf flooring not only adds realism but also protects your clubs and balls — and it’s not cheap. Safety features like side netting or foam padding around frames may seem optional, but after your first shanked shot, you’ll realize they’re essential.
The key takeaway: budget an additional 20–30% beyond your initial plan for these hidden costs. It’s better to overestimate than to be forced into cutting corners that will reduce the quality and safety of your setup.
Final Thoughts
A home golf simulator is one of the best investments you can make for your game — but only if you plan ahead. Take the time to measure carefully (especially ceiling height), research your equipment (don’t skimp on the projector), and account for all the hidden costs that can sneak up on you. By learning from these three lessons, you’ll set yourself up for a smoother build and more time enjoying the game indoors.
More to read
View all-
3 Things I Wish I Knew Before Building My Golf ...
3 Things I Wish I Knew Before Building My Golf Simulator Building a golf simulator at home is an exciting project. But like any big investment, there are lessons you...
3 Things I Wish I Knew Before Building My Golf ...
3 Things I Wish I Knew Before Building My Golf Simulator Building a golf simulator at home is an exciting project. But like any big investment, there are lessons you...
-
How to Install a Golf Simulator in Your Garage:...
If you’re passionate about golf and want to play year-round, your garage might be the perfect spot for a golf simulator installation. With the right planning, you can transform this...
How to Install a Golf Simulator in Your Garage:...
If you’re passionate about golf and want to play year-round, your garage might be the perfect spot for a golf simulator installation. With the right planning, you can transform this...
-

How Much Do Golf Simulators Cost?
The Cost of Golf Simulators: What to Expect at Every Budget Level Golf simulators can range from modest setups you assemble in a garage, to high-end commercial bays used by...
How Much Do Golf Simulators Cost?
The Cost of Golf Simulators: What to Expect at Every Budget Level Golf simulators can range from modest setups you assemble in a garage, to high-end commercial bays used by...
-
How Do Golf Simulators Work?
How Do Golf Launch Monitors Work? There are two main technologies used in launch monitors: 1. Camera-Based (Photometric) Launch Monitors Use high-speed cameras to capture images of the golf ball...
How Do Golf Simulators Work?
How Do Golf Launch Monitors Work? There are two main technologies used in launch monitors: 1. Camera-Based (Photometric) Launch Monitors Use high-speed cameras to capture images of the golf ball...


